ASIC Miner ICERIVER KAS KS0 Profitability In the realm of cryptocurrency mining, the Iceriver KAS KS0 miner has garnered widespread attention. Tailored specifically for the Kaspa network's KHeavyHash algorithm, it boasts high hashing power and low power consumption, making it an ideal choice for many miners. In this article, we will comprehensively assess IceRiver KS0 profitability while considering the Kaspa market conditions and the attributes of KS0 miner. Kaspa Market Dynamics Kaspa is a vibrant cryptocurrency network aimed at delivering high performance and scalability for everyday transactions. At the time of writing this article, the Kaspa coin trades at approximately $0.04959. But it's essential to note that cryptocurrency markets are highly susceptible to price volatility. Hence, investors must remain vigilant about market dynamics. Additionally, the Kaspa network's mining difficulty and reward mechanisms play a role in mining returns. Attributes of the IceRiver KS...
What should I do if the soldering iron does not hang tin?
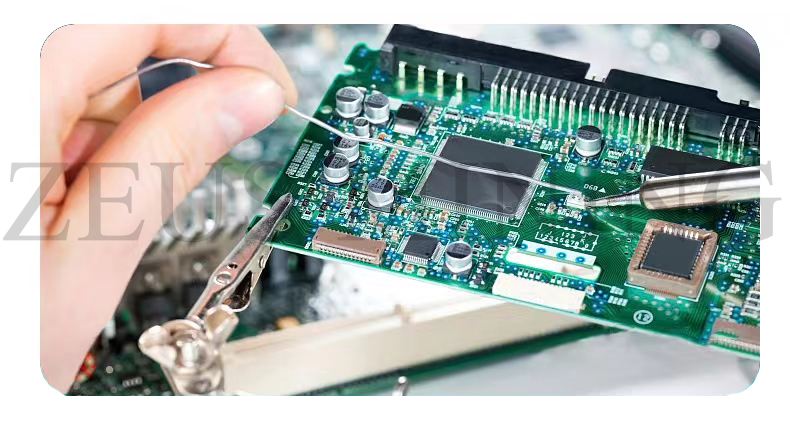
In PCBA processing plants, an electric soldering iron is often necessary to solder or repair products. However, after the electric soldering iron has been used for a while, the phenomenon that the tip of the soldering iron cannot be attached to the tin often occurs due to incorrect operation methods. So, how to solve this kind of imagination?
Cause of issue
1. The power of the soldering iron is too large
The power of the soldering iron tip ranges from 20W, 25W, to several hundred watts. The external heat type soldering iron has a complex manufacturing process, low efficiency, and high price. The quick-heat type is difficult to operate due to the large transformer in hand; however, the temperature rises quickly, the soldering iron tip, the tin plating effect is good, anti-oxidation, and long life ANLIXIN's 936A soldering iron is the first choice. It adopts a temperature adjustable and constant temperature electric soldering iron, electrostatic protection, and rapid heating. It is a sharp and sophisticated electronic repair tool.
Use an electric soldering iron to repair transistors, IC radios, and TV sets and perform common circuit experiments. Generally, 20W is appropriate. When repairing vacuum tube machines, such as tube amplifiers and old instruments, 35W is appropriate, and external heating is 45W. The wiring of the large welding transformer and the grounding trunk line on the metal base plate use the internal heating type 50W and the external heating type 75W. You can compare whether the power of the soldering iron tip is too large.
2. The quality of the soldering iron tip is poor
There are some low-quality soldering iron tips on the market. However, if you buy them accidentally, it is easy to have the problem of the tin hanging on the tip of the soldering iron.
Solution:
Prepare a blade and a new solder wire with additives. First, burn the soldering iron, then pull it out, use a blade to scrape the place to be tinned clean, and use a new solder wire to fill up the tin; it may still not go up at first, then scrape clean if it can't go up, and reapply it when When it reaches a suitable temperature, the solder will naturally go up. If it still doesn't work, repeat the process. If it doesn't work, your soldering iron tip contains too much tin and can't get tin on. Try it with a magnet, and you'll know.
3. The soldering iron does not work for a long time
The electric soldering iron is not used long after being powered on. Inferior solder and rosin are used, or the soldering head is not protected by tin before being placed for a long time, which causes the tin layer of the soldering head of the electric soldering iron to fall off in the soldering head not hanging tin.
Solution:
1) Remove the power supply, remove the soldering head when the soldering iron is cooled (note: remove it lightly, do not fold the heating rod), and grind off the black non-stick tin layer on the prepared 1000-grit sandpaper, of course, If the sandpaper is not available, the fine sand surface of the household whetstone can also be polished.
2) Install the copper-colored welding head on the electric soldering iron and plug in the power supply.
3) When the tip of the electric soldering iron gradually heats up (be careful not to dip the tip of a rosin and water-absorbing sponge), touch the tip with a rosin-cored solder wire. From the initial non-melting to the gradual increase of the temperature of the soldering head, the solder wire gradually begins to melt. At this time, after the solder wire touches all the copper-colored surfaces of the welding head, the solder can be hung.
4) Dip the soldering tip with the solder, and then it is ready to use.
Precautions for tinning the soldering iron:
1. When using an electric soldering iron, long-term dry burning is most likely to cause the soldering iron not to be tinned, so if it is not used for a long time, such as 10 minutes, the electric soldering iron should be unplugged.
2. Before using the electric soldering iron, the tip of the soldering iron should be hung with tin, and a layer of tin should be hung after use, which can prolong the service life of the electric soldering iron.
Comments
Post a Comment
Tell us your opinion