ASIC Miner ICERIVER KAS KS0 Profitability In the realm of cryptocurrency mining, the Iceriver KAS KS0 miner has garnered widespread attention. Tailored specifically for the Kaspa network's KHeavyHash algorithm, it boasts high hashing power and low power consumption, making it an ideal choice for many miners. In this article, we will comprehensively assess IceRiver KS0 profitability while considering the Kaspa market conditions and the attributes of KS0 miner. Kaspa Market Dynamics Kaspa is a vibrant cryptocurrency network aimed at delivering high performance and scalability for everyday transactions. At the time of writing this article, the Kaspa coin trades at approximately $0.04959. But it's essential to note that cryptocurrency markets are highly susceptible to price volatility. Hence, investors must remain vigilant about market dynamics. Additionally, the Kaspa network's mining difficulty and reward mechanisms play a role in mining returns. Attributes of the IceRiver KS...
Whatsminer H3 control board firmware burning guide

1. Download and unzip the "H3 SD card Program" from Whatsminer's official website.
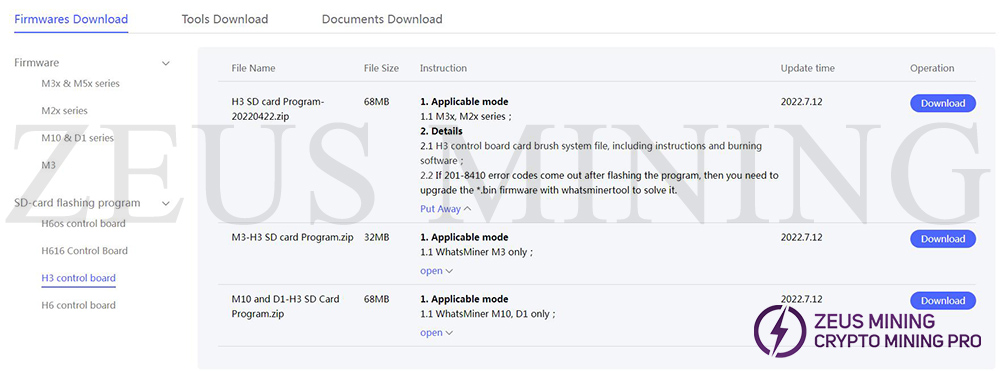
2. Insert the card reader with the memory card into the PC and run the unzipped PhoenixCard application.

3. After opening, the following interface will be displayed:
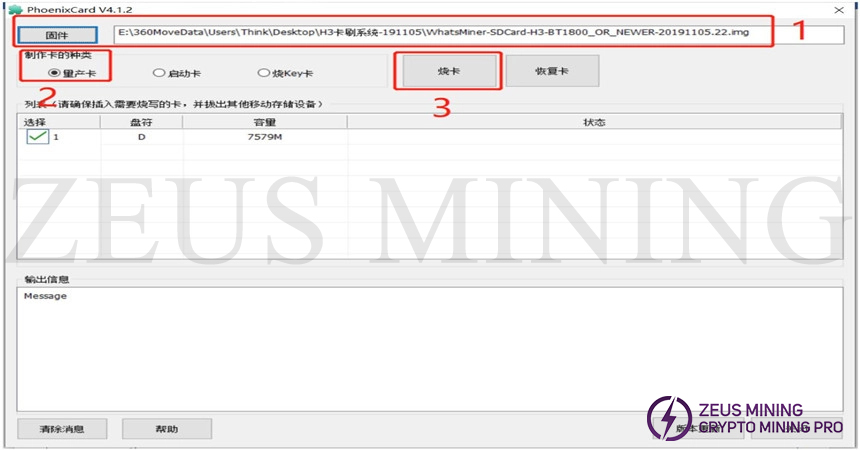
1) Select the firmware, and select the image file with img in the version file;

2) Click "Burn Card";
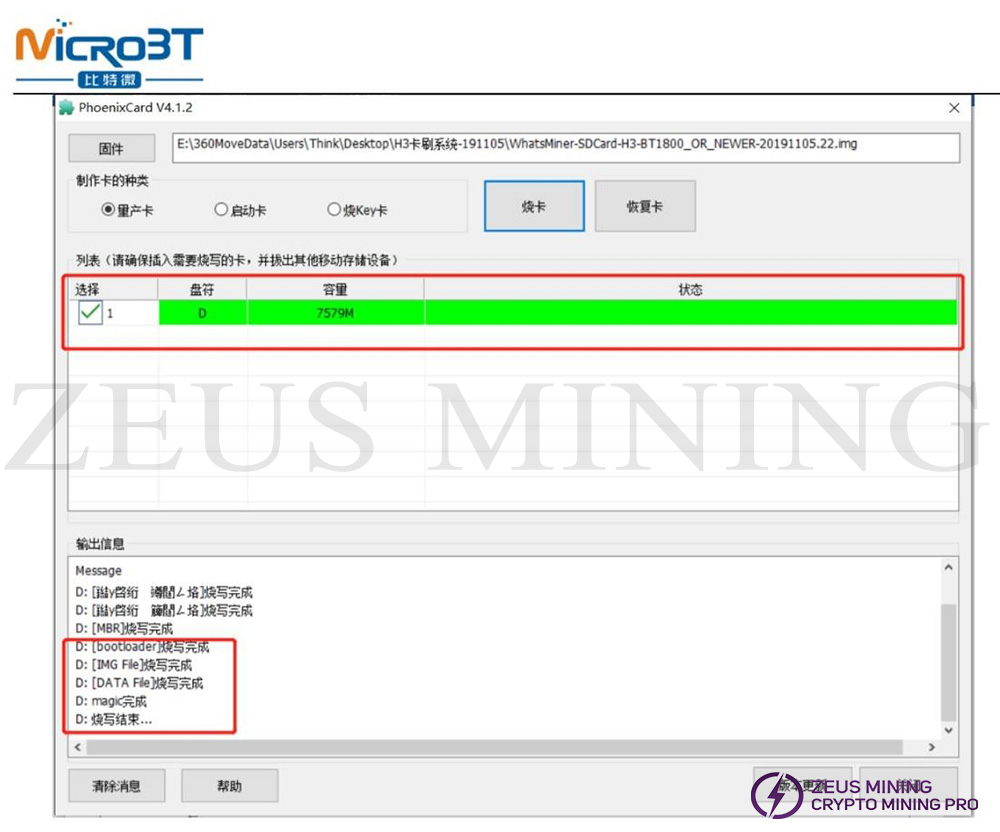
Note: If the card burning fails, first select "Restore Card," then close it, and then follow the steps 2~3 in a loop; the card burning process will take about 1 or 2 minutes, and the card will be displayed in green when the card is burned successfully, as shown in the figure:
3) After burning the card, take out the card, insert it into the card slot of the H3 control board, insert it in the direction shown in the figure, and then power on (Note: the H3 control board does not need jumpers).

4) During the process of programming the H3 control board, the green light is always on, and the red light is flashing, as shown in the figure:
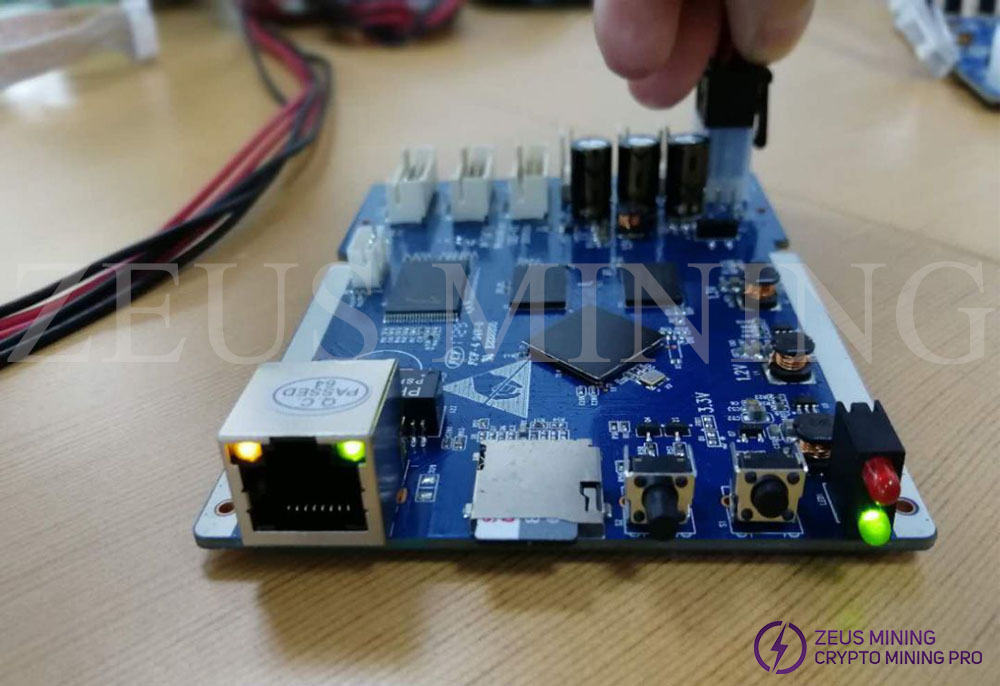

5) After the H3 control board is successfully programmed, both indicators will be off, as shown in the figure below:

Following the above steps, you completed the operation of the H3 control board.
Comments
Post a Comment
Tell us your opinion