ASIC Miner ICERIVER KAS KS0 Profitability In the realm of cryptocurrency mining, the Iceriver KAS KS0 miner has garnered widespread attention. Tailored specifically for the Kaspa network's KHeavyHash algorithm, it boasts high hashing power and low power consumption, making it an ideal choice for many miners. In this article, we will comprehensively assess IceRiver KS0 profitability while considering the Kaspa market conditions and the attributes of KS0 miner. Kaspa Market Dynamics Kaspa is a vibrant cryptocurrency network aimed at delivering high performance and scalability for everyday transactions. At the time of writing this article, the Kaspa coin trades at approximately $0.04959. But it's essential to note that cryptocurrency markets are highly susceptible to price volatility. Hence, investors must remain vigilant about market dynamics. Additionally, the Kaspa network's mining difficulty and reward mechanisms play a role in mining returns. Attributes of the IceRiver KS...
Hummingbird H7 Pro miner evaluation
The following brings you the evaluation of the use of the Hummingbird H7 Pro 53T miner.
Official parameters of Hummingbird H7 Pro 53T miner
Hash rate: 53T/S (±5%)
Power consumption: 3445 W (±5%)
Algorithm: SHA256
Power consumption ratio: 65W/TH
AC input range: 176V-264Vac
Size: 350mm*200mm*395mm
Weight: 21KG (net weight); 22.7KG (with box)
Network Connection: Ethernet
Heat dissipation: 4×14038 fans
Noise: 74dB
Operating environment: working temperature (0℃~40℃); working humidity (5%RH~95%RH), non-condensing.
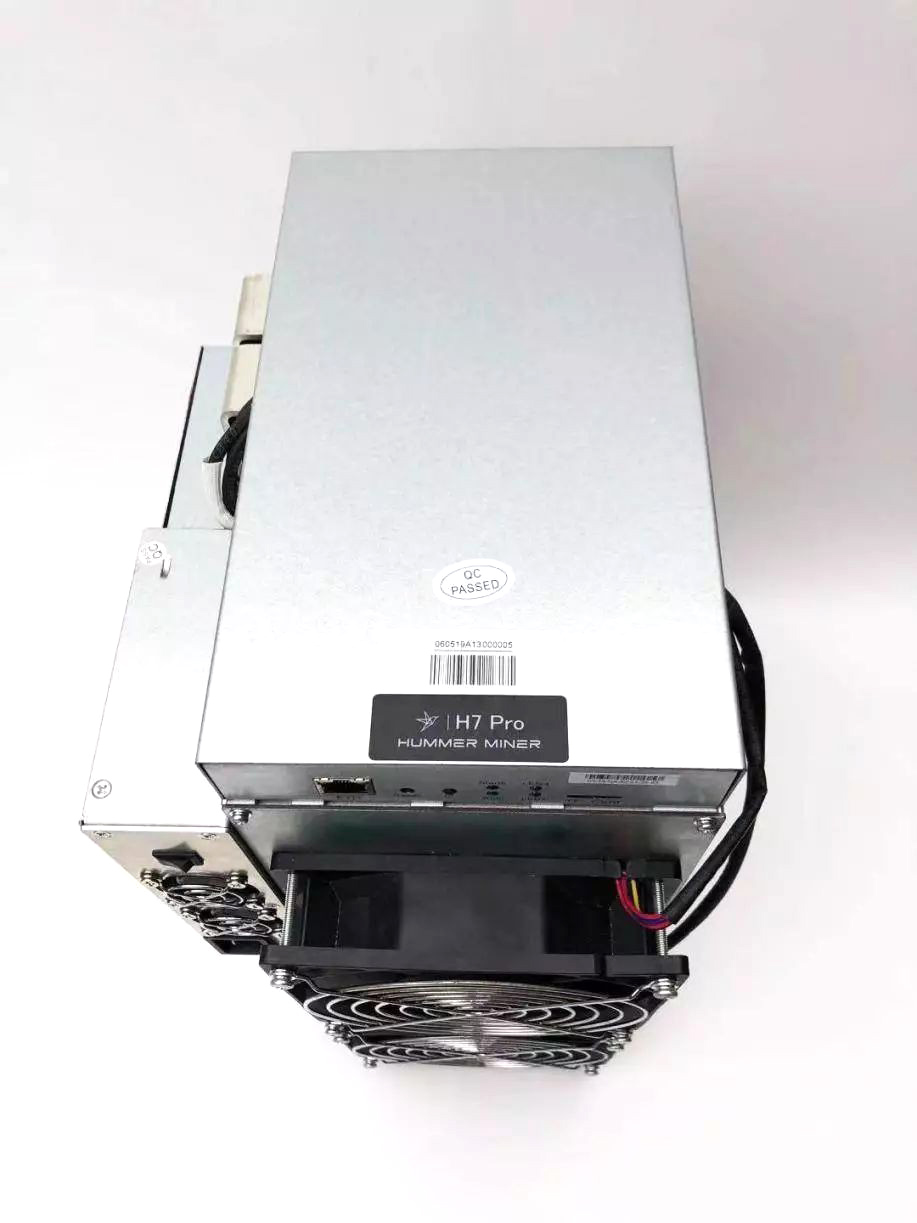
Whole miner appearance
The Hummingbird H7 Pro adopts the current mainstream all-in-one dual-tube fan design, which simplifies the use process, has a simple shape, is easy to use, and can be mined when put on the shelf.
Nameplate logo side
Wiring port side (air intake)

On the interface side, there are power interfaces, power switches, network cable interfaces, Reset buttons, IP buttons, status indicators, alarm indicators, TF card slots, etc.
Front (air outlet)

Installation and debugging
Miner hardware connection and installation are effortless; plug in the power cable and the network cable.
1. Find the miner's IP address
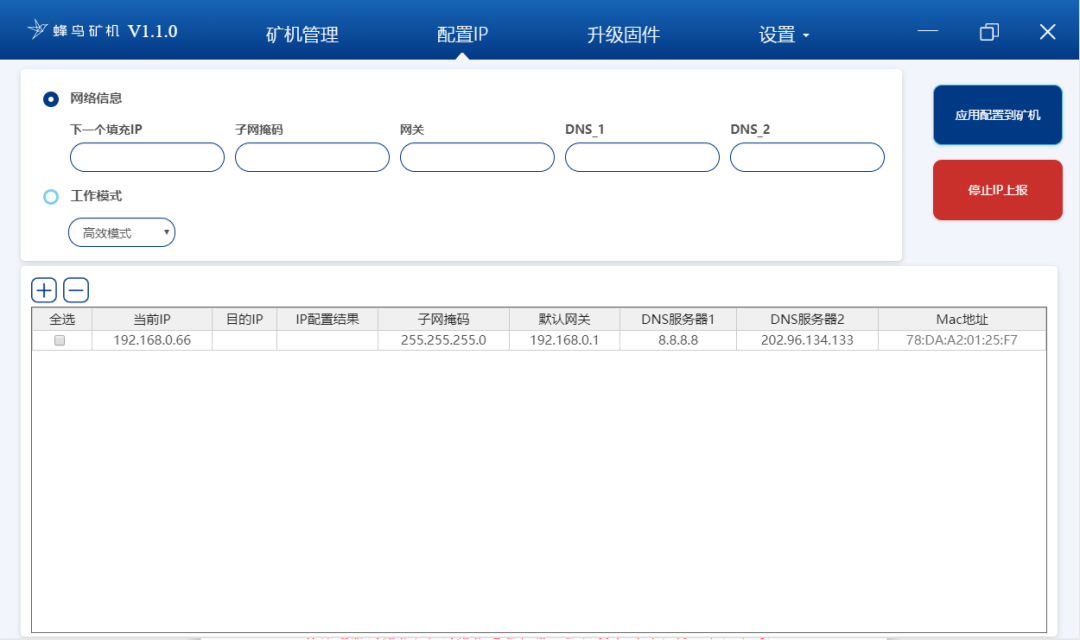
The miner defaults to DHCP to automatically assign an IP address, decompress and run the Hummingbird batch management software, click "Configure" ---> "Start to detect miners," on the side of the miner's wiring port, press the IP button, after the red light flashes 3 times, release the IP button, you can see the miner's IP in the management software.
2. Enter the miner backstage
Open the computer browser, enter the miner IP obtained above in the browser address bar, press Enter to enter the login page, and enter "admin" for both the username and password.
3. Mining settings
Click "Mining Pool Configuration" on the left menu in the miner backstage, enter the setting page, modify or set the following items:
Pool No.1: Main mining pool address
Worker: It needs to be set according to the requirements of the mining pool
Password: Miner password can be set at will
The backup mining pool Pool No.2 and Pool No.3 are optional. After filling in, if the primary mining pool loses connection, it will automatically switch to the backup mining pool.
After filling in, click "Update The Pool Configuration" to switch mining pools.
Other settings
4. Fixed IP
Setting a static IP can facilitate the management if there are many miners, while few miners can be ignored. Click on the left menu "System Setting"--->"Network Setting," remove the DHCP option box, you can switch to static IP, and fill in the IP, gateway, and other information, click "Update The Network Configuration" to complete the modification.
View miner running status
Click "Dashboard" on the left menu bar to view various metrics. The high-energy mode and high-efficiency mode in the upper right corner can be switched with one click.

Project test
Site temperature
The temperature range of the hash board is 63℃-70℃. The site temperature was about 24°C before the test, and the miner was 26.2°C after a week of operation.
Noise level
The noise is stable between 70dB-82dB.
Speed of the fan
The fan speed percentage at the air inlet is 41%, and the fan speed at the outlet is 81%.

Running mining power consumption
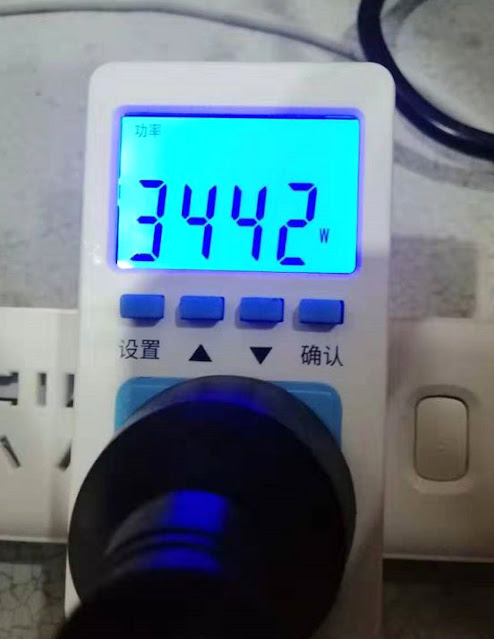
The power consumption fluctuation range of miner operation is 3440W-3496W, and the average power consumption is 3460W.

Miner hash rate
The miners' backstage hash rate is stable between 53.1TH/s and 53.6TH/s. The test mining pool selected F2Pool. The fish pool shows that the 24-hour average hash rate is 53.2TH/s, and the graph is relatively stable.
Taking the average power consumption of 3460W and the average hash rate of 53.2T, the power consumption ratio is 65.04W/T, which is very competitive among Bitcoin spot miners.
Summarize
1. The integrated design of the whole miner, the shape is simple, and the actual measurement shows that the hash rate is stable. As a mass-produced miner, the 53T belongs to the leading model of the significant hash rate level.
2. In terms of performance, the advantage of Hummingbird Miner lies in its stable operation, attention to detail, and good quality. As a late mining manufacturer, various parameters show a strong trend of catching up with first-tier brands.
The content and pictures of this article are from the Internet, compiled and edited by ZEUS MINING.


Comments
Post a Comment
Tell us your opinion