ASIC Miner ICERIVER KAS KS0 Profitability In the realm of cryptocurrency mining, the Iceriver KAS KS0 miner has garnered widespread attention. Tailored specifically for the Kaspa network's KHeavyHash algorithm, it boasts high hashing power and low power consumption, making it an ideal choice for many miners. In this article, we will comprehensively assess IceRiver KS0 profitability while considering the Kaspa market conditions and the attributes of KS0 miner. Kaspa Market Dynamics Kaspa is a vibrant cryptocurrency network aimed at delivering high performance and scalability for everyday transactions. At the time of writing this article, the Kaspa coin trades at approximately $0.04959. But it's essential to note that cryptocurrency markets are highly susceptible to price volatility. Hence, investors must remain vigilant about market dynamics. Additionally, the Kaspa network's mining difficulty and reward mechanisms play a role in mining returns. Attributes of the IceRiver KS...
Antminer S7 4.73TH 1293w Bitcoin miner mining tutorial
The Antminer S7 uses a 28nm chip. This tutorial will demonstrate the setup of an Antminer S7 (4.73TH @ 1293w) bitcoin miner.
For the S7 mining guide, it is recommended to refer to Antminer S7 Manual.
Miner specifications
Brand | Antminer S7 |
Hash rate | 4.73 TH/s ± 5% |
Energy consumption | 1293W±10% |
Default frequency | 700M |
Number of chips | 135 * BM1385 |
Size | 301mm(L) * 123mm(W) * 155mm(H) |
Number of fans | 2 |
Internet connection | Ethernet |
Power supply | PSU not included |
Power recommendation |
Check before operation
· When you receive this miner for the first time, please be sure to check the miner before powering on the device. Shake the miner gently and check for loose or detached fins during transport. (If the device is powered on with the heat sink dropped, there is a risk of burning the hash board.)
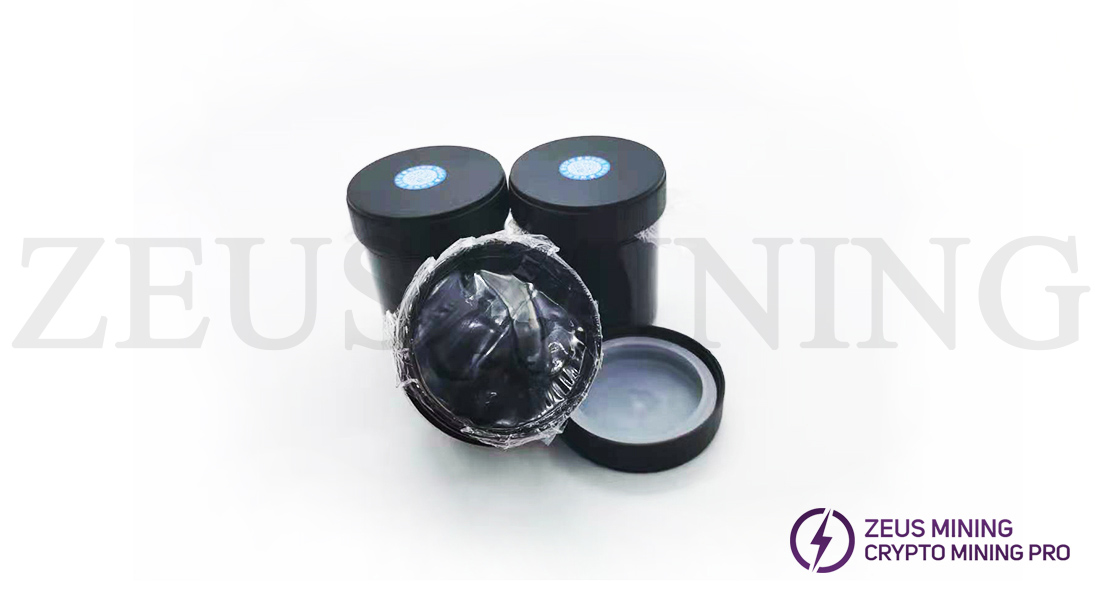
·If any heatsinks fall off, it is recommended to purchase thermosetting adhesive to re-fix them (welcome to purchase on the ZEUS MINING official website). Do not power on the miner until the dropped heat sink has been repaired.
Ready to work
· Please prepare a power supply (can withstand power >= 1500w, 6pin x 10); you can use multiple PSUs to connect to 1 miner. But don't connect 1 PSU to more than 1 miner or more than 1 hash board.
· Use an ethernet cable to connect the miner to the router.
· For miner configuration, use an ethernet cable to connect the miner to the same router that your PC is also connected to (your PC is only used for miner configuration).
Network check
· Make sure your network is stable enough: S7 miners have high requirements on the network. If the network is unstable, miners may stop working without any warning. Also, an unstable network may bring damage to the hash board.
· Make sure your router is of good quality and stable.
In the network connection process, it is not recommended that you use a single mini router.
Miner connection and mining guide
·First of all, please check that all date cables on the miner are plugged in tightly.
· There are 10 6pin ports on the miner. You need to connect all 6pin ports to your PSU.
·Connect to the 6pin port next to the control board.
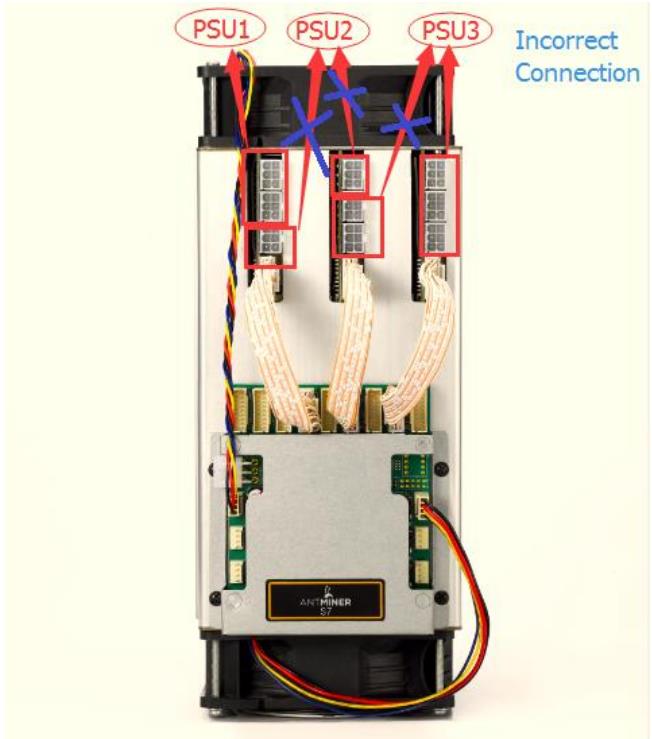
Important note: There are 3 hash boards in the miner, and each hash board has 3 6pin ports. Do not connect more than 1 PSU to 1 hash board. (That is, the 6pin data cable you connect to 1 hash board should only come from 1 PSU.). See the figure below for correct and incorrect connections.
· Correct connection:
· Incorrect connection:
· Miner connection completed.
·Turn on the miner. (IMPORTANT: If you use multiple brands of power supply, you should power on the PSU connected to the 6PIN port next to the control board, for example, if you use other CORSAIR 850W PSU connected to the port, first power on all other PSUs, then turn this power on).
·Wait about 1~2 minutes, the fan of the miner will be loud for a while and then slow down.
·Use the software to scan the IP of the miner on your PC. To scan the miner's IP, please see: How to use IP Reporter?
·Then, you can log in to the miner configuration page with the IP you just scanned. (both username and password are "root")
·Enter the "Miner Status" page, and keep refreshing the page until the page displays data (speed, miner account, mining pool, etc.), indicating that mining starts. Generally, miners need about 3 to 7 minutes to start mining. The fan may beep several times. Sometimes, the data on the page may disappear within seconds or a minute of the start of mining. It will be back up and running normally soon.
·Enter the "Miner Configuration" page, configure your mining pool address, miner account, miner password, etc., and click "Save and Apply."
·Save the changes and wait about 1 minute to apply the settings.
·Enter the "Miner Status" page and refresh the page until the page displays data. Then, the miner starts to work normally.
· If no data is displayed or the miner beeps for more than 10 minutes, restart the miner (power it off, wait a minute, then power it back on). After restarting, please go to the "Miner Status" page and wait for the data to be displayed.
· Different miners may have different behaviors; they usually wait for the miners to work.
Mining Tips
If you are running multiple miners at the same time (<= 10 miners), please note the following tips:
1) The red light of the miner keeps flashing
Due to various reasons such as unstable network, high temperature, etc., the red LED keeps flashing.
Anyway, if your miner is working fine at average speed, ignore the blinking LED.
If your miner is mining slower or has more problems with the miner at the same time (such as ASIC status showing ----), please check the troubleshooting section below.
2) Heat dissipation
Ensure that the hot air from the (miner) fan is dissipated in time.
Ensure that the air exhausted from one miner cannot be re-inhaled by another miner.
3) If you connect multiple miners to one power strip, you need:
Check the maximum current rating of the power board. Some power strips, for example, have a maximum current rating of about 2000w. Since the power consumption of the miner is close to 1400w, it is best to connect only one miner to one power board. Otherwise, miners may stop working.
Mining speed description
The final model of the Antminer S7 is "4.73 TH/s @ 1293w", and the "Default Frequency" is set to "700M".
The rated speed of the Antminer S7 is "4.73 TH/s ± 5%", so the speed may fluctuate between "4.49 TH/s ~ 4.96 TH/s".
In our tests, the "GH/S(5s)" of the "Miner Status" page changed frequently, but the "GH/S(avg)" remained stable. So don't worry about the frequently changing "GH/S(5s)" speed.
· However, if both "GH/S(5s)" and "GH/S(5s)" is low (e.g., 3000GH/s), restart the miner, and the speed will be normal.
Troubleshooting
For your troubles with mining, try the following suggestions:
· Shut down the miner and restart it.
· Check your home network and mining pool to ensure the network is working.
· Check if all cables on the miner are plugged in tightly. Especially the three-date cables connecting the hash board. They may come loose during transport.
· Check if all 10 6pin ports on the miner are connected to your PSU.
· Check if your miner is rattling to ensure no heat sink is falling off.
· Reset miners. A reset hole is next to the network port (as shown in the figure below). After the miner is powered on, wait for 5 minutes (until the miner starts mining), and press the hole with a pin for about 10 seconds. Then wait about 5 minutes for the reset. After the reset, it may be necessary to rescan the miner's IP address.
· Firmware upgrade. It is recommended to check the article: How to reload or upgrade the firmware?
The content and pictures of this article are from the Internet, compiled and edited by ZEUS MINING.


Comments
Post a Comment
Tell us your opinion