ASIC Miner ICERIVER KAS KS0 Profitability In the realm of cryptocurrency mining, the Iceriver KAS KS0 miner has garnered widespread attention. Tailored specifically for the Kaspa network's KHeavyHash algorithm, it boasts high hashing power and low power consumption, making it an ideal choice for many miners. In this article, we will comprehensively assess IceRiver KS0 profitability while considering the Kaspa market conditions and the attributes of KS0 miner. Kaspa Market Dynamics Kaspa is a vibrant cryptocurrency network aimed at delivering high performance and scalability for everyday transactions. At the time of writing this article, the Kaspa coin trades at approximately $0.04959. But it's essential to note that cryptocurrency markets are highly susceptible to price volatility. Hence, investors must remain vigilant about market dynamics. Additionally, the Kaspa network's mining difficulty and reward mechanisms play a role in mining returns. Attributes of the IceRiver KS...
Baikal Giant A900 X11 Miner Mining Tutorial
Baikal Giant-A900 is a miner that supports six X11, X13, X14, X15, Quark, and Qubit algorithms. With its excellent hash rate of 900MH/s and power consumption ratio of 217W, it has an advantage in the market.
This article will show you the setup and operation of a miner with coinmine.pl pool mining.
Miner specifications
Brand | Baikal Giant-A900 |
Hash Rate | 900 MH/s ± 5% |
Power Consumption | 217w |
Cooling | 1 * fan |
Network Connection | Ethernet |
PSU | NO PSU, NEED a PSU > 300w with 6pin * 2 |
PSU Recommend | LITEON 750w PSU |
PSU preparation
This miner does not come with a PSU. You'll need to purchase a 750W PSU separately. Or >= 300w PSU with 6pin * 2 (or 8pin * 2).
Miner connection
· Take out the miner from the express box we received; we can see that the miner has two blades.
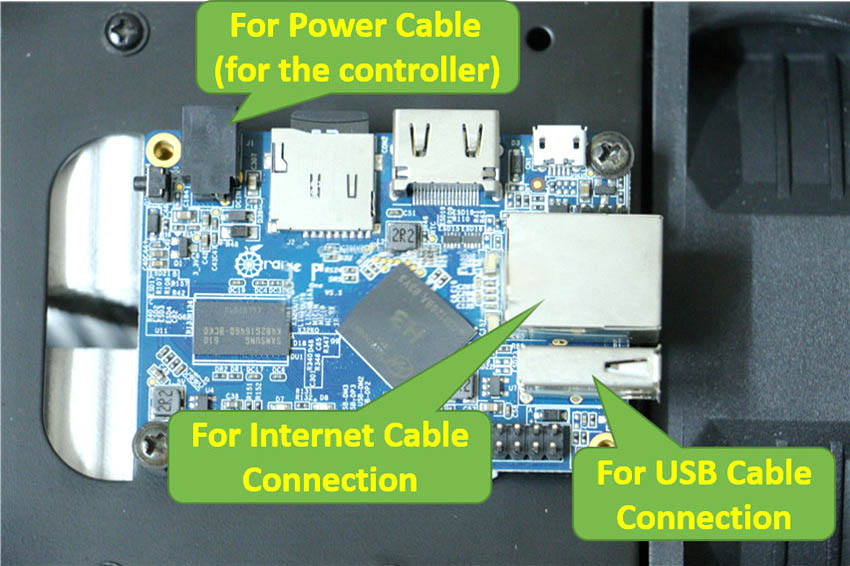
· The control panel of the miner is located on the top of the miner. Some of the ports on the control board are the power cable port, Internet cable port, and USB cable port.
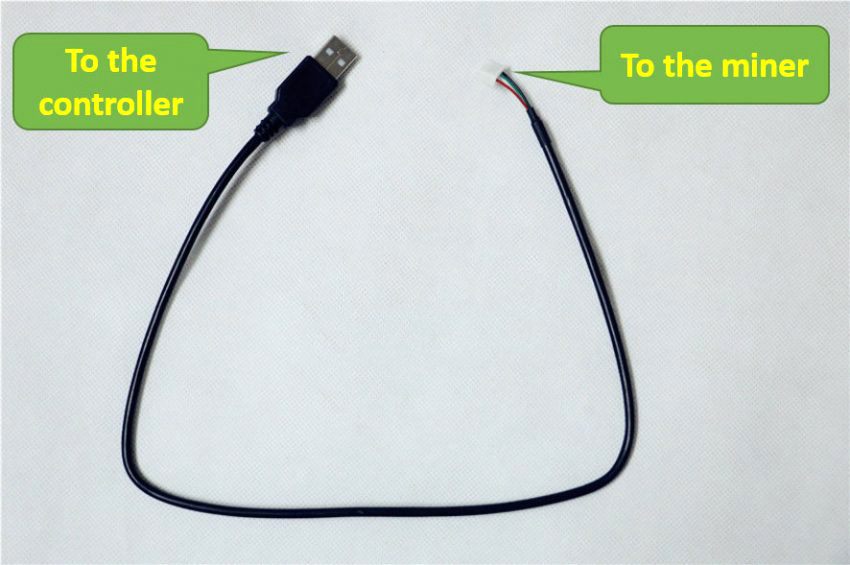
· In addition to the miner, there are some cables in the miner box, one is a USB cable, and the other two are blade cables. Their functions are:
USB cable: connect the miner to the control board.
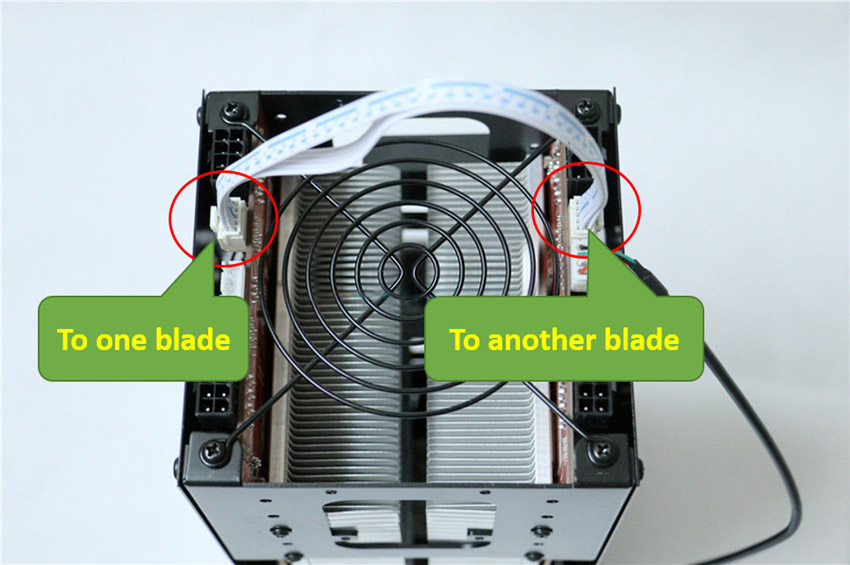
Blade Cable: Connects two blades. (only one is required)
· There are some ports on the other end of the miner; just connect the ports in the red circle in the picture below. Do not connect ports other than those circled in red.
· The ports in the red circle are:
8PIN port: used for PSU (power supply) to connect to the miner.
Blade connection ports: Two blade connection ports. Connect the two blades via a blade cable.
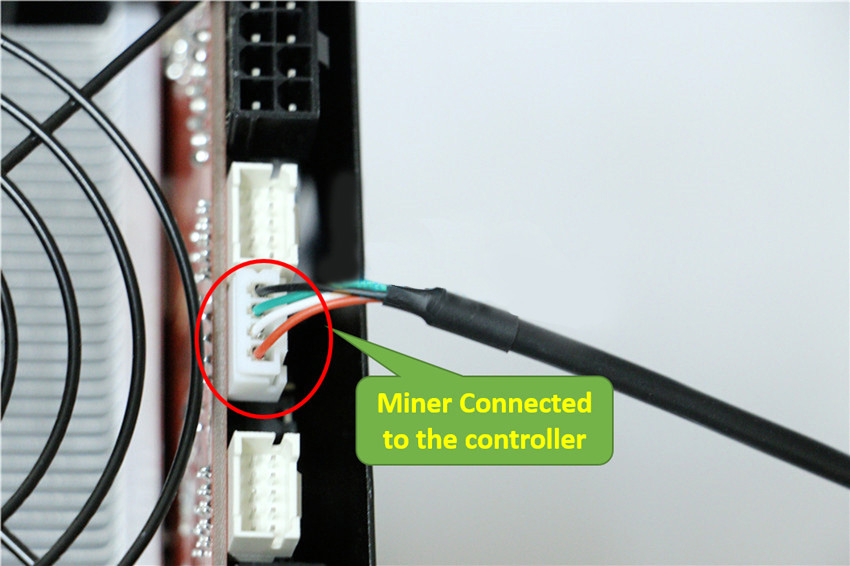
USB Port: Connect the miner to the control board via a USB cable.
· After introducing the miner's port, I will tell you how to connect.
· First, connect the miner's power cord.
· Second, connect the miner and the control board via a USB cable.
· Only one blade cable is required for the connection of two blades.
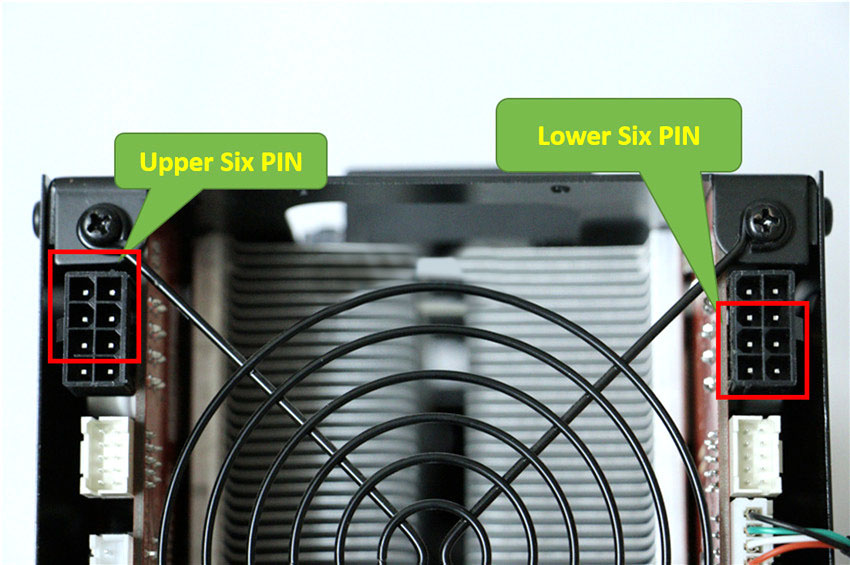
· Now connect the PSU to the miner via the two 8PIN ports on the miner. The port on the miner is the 8PIN port. However, it also works with 6PIN connectors.
· If your power supply has a 6PIN interface, please note: You should use the upper six PINs of the left 6PIN port on the miner and the lower six PINs of the right 6PIN port on the miner. Otherwise, it cannot adapt.
· The effect diagram of the connection is as follows.
Mining guide
The mining guide for the Baikal Giant-A900 X11 miner is the same as the Baikal Mini 150MH X11 miner.
· First, check whether the miner is connected correctly. After the connection is correct, connect the miner and the computer to the LAN port of the same router.
· Power on the miner and wait 1-3 minutes to complete the startup.
· Scan the miner's IP address: The "network protocol" of the miner is "DHCP." The IP address will be different under different networks. It is recommended to refer to the article How to use IP Reporter?
· Log in to the miner configuration page: Open Google Chrome and log in to the IP address you just scanned (such as 192.168.1.217). The password is "Baikal."
· If you cannot log in to the miner configuration page, it is recommended to wait for one minute and then try to log in again.
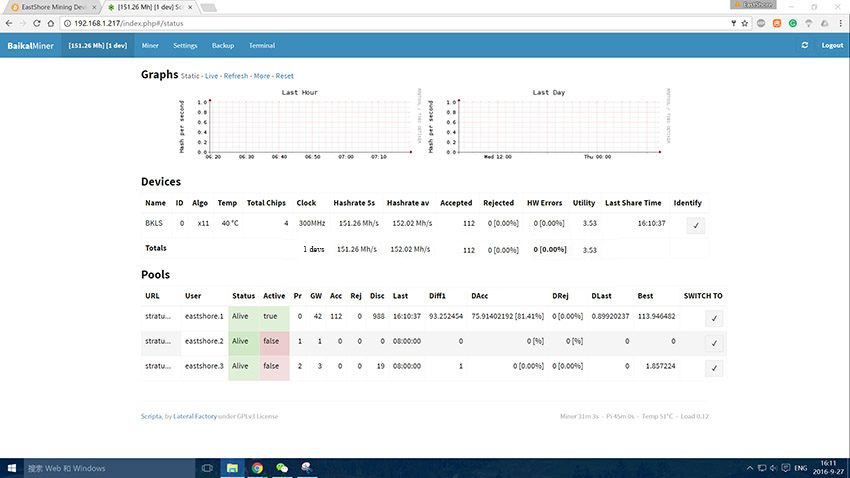
· After logging in, you will see the miner's "home page" on the following page.
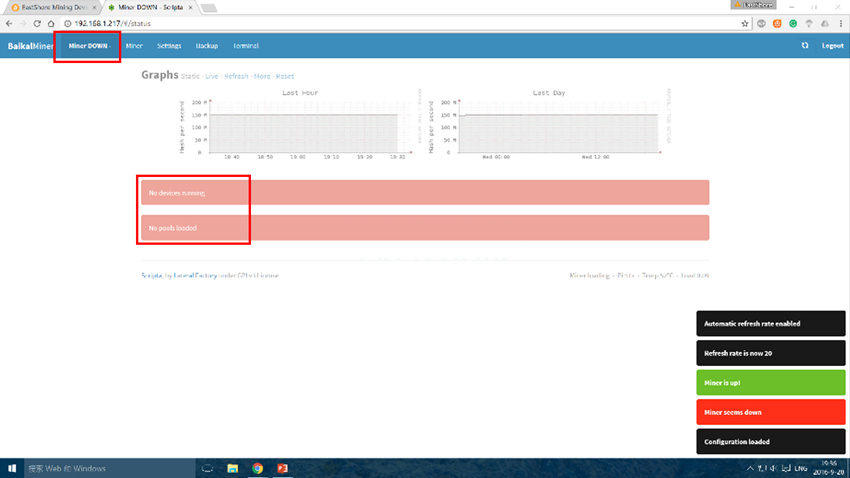
· If the configuration page shows something like "No devices running" and displays no other data. And "Miner DOWN" may be displayed in the upper left corner of the page. Please wait for a while until some device and pool data is displayed.
· Click the "Miner" option at the top of the page to start the mining account setup.
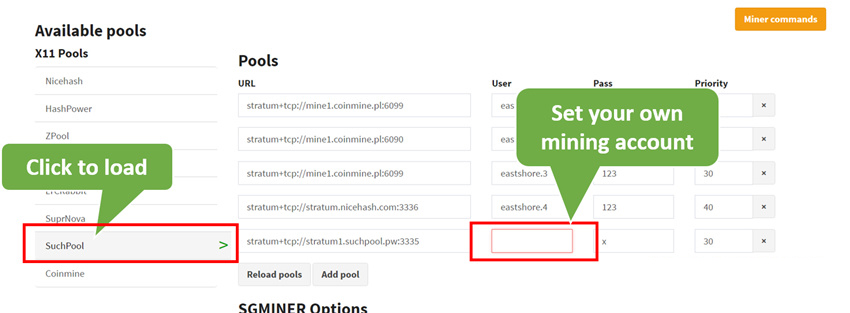
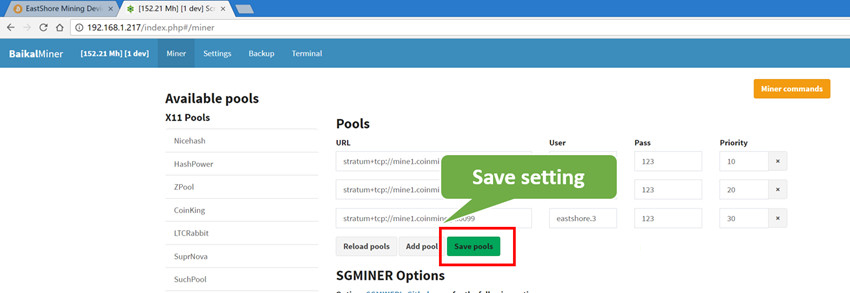
· On the "Miner" setting page, you can click "Add Pool" to add a mining account or click the small "x" to delete the mining account record.
· You can also add account settings by clicking Predefined Pools; the default settings will be loaded.
· After setting the mining account information, click "Save Pool" to save the settings.
· Wait 1~3 minutes, the miner will reload the mining settings and use the mining account you set up to start mining.
· Click the red circle in the image below to navigate the home page.
· You can also view mining details on the configuration homepage. The mining speed is automatically refreshed every 5 seconds.
· The miner setup is complete; you can start mining.
The content and pictures of this article are from the Internet, compiled and edited by ZEUS MINING.











Comments
Post a Comment
Tell us your opinion