ASIC Miner ICERIVER KAS KS0 Profitability In the realm of cryptocurrency mining, the Iceriver KAS KS0 miner has garnered widespread attention. Tailored specifically for the Kaspa network's KHeavyHash algorithm, it boasts high hashing power and low power consumption, making it an ideal choice for many miners. In this article, we will comprehensively assess IceRiver KS0 profitability while considering the Kaspa market conditions and the attributes of KS0 miner. Kaspa Market Dynamics Kaspa is a vibrant cryptocurrency network aimed at delivering high performance and scalability for everyday transactions. At the time of writing this article, the Kaspa coin trades at approximately $0.04959. But it's essential to note that cryptocurrency markets are highly susceptible to price volatility. Hence, investors must remain vigilant about market dynamics. Additionally, the Kaspa network's mining difficulty and reward mechanisms play a role in mining returns. Attributes of the IceRiver KS...
PandaMiner Ethereum GPU Miner Mining Tutorial
PandaMiner contains 8 specially customized AMD RX480s, carefully designed to bring GPU mining to an unprecedented level of efficiency. In addition, PandaMiner is developed using the Windows operating system and is equipped with three mainstream competitive mining solutions: ETH, Zcash, and Monero XMR.
In this article, ZEUS MINING will introduce the usage tutorial of PandaMiner in detail for the majority of miners.
Miner specifications
Brand | PandaMiner |
Hash rate | ETH: 230MH/s @ 1380w |
Zcash: 1160 SH/s @1100w | |
XMR: 5865 H/s @ 1057w | |
Cooling | 9*fan |
Network connection | Ethernet |
PSU | PSU: NO PSU, NEED a PSU > 1500w with 6pin* 7 |
PSU recommend |
Miner connection
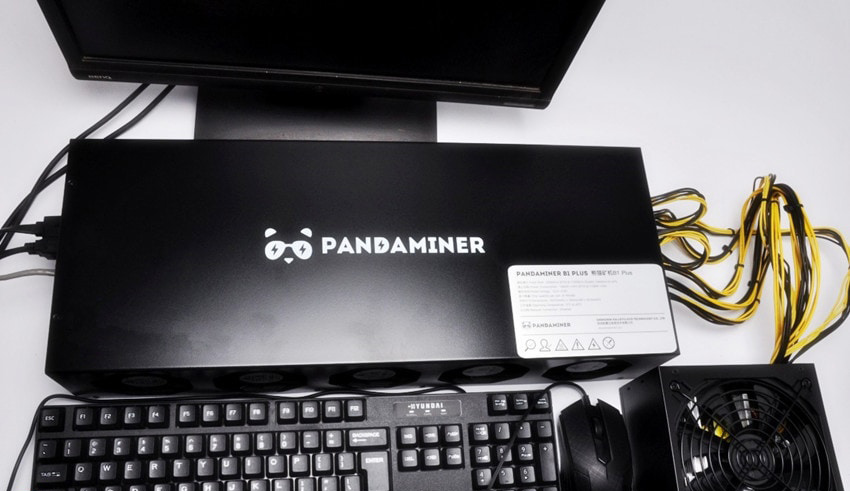
The picture below shows the renderings we received from PandaMiner.
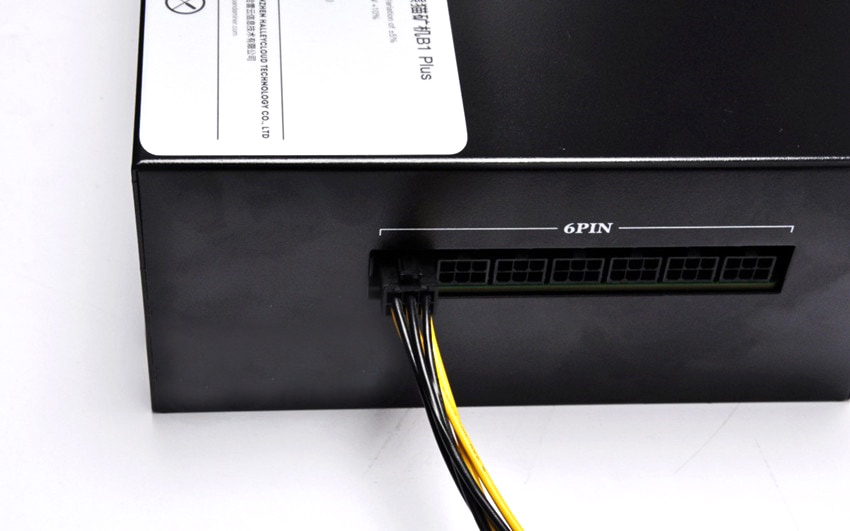
We can see that there are 7 6pin ports on the miner's side. It is used to connect the PSU.
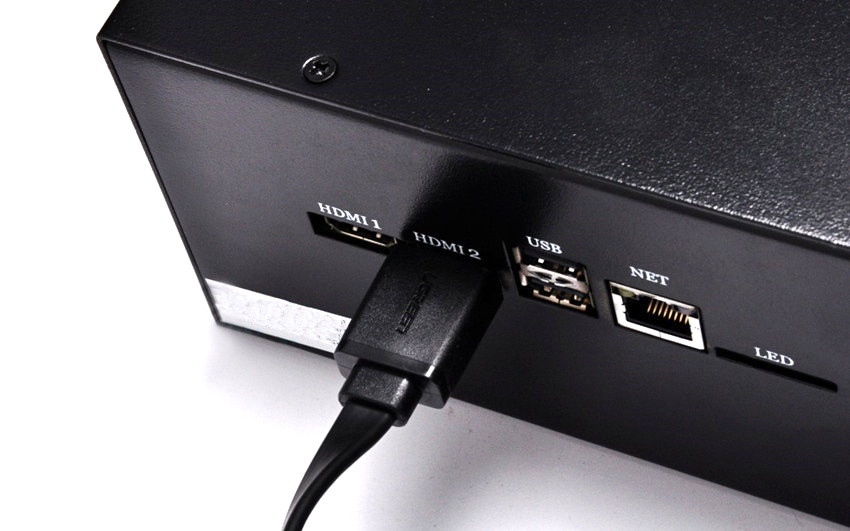
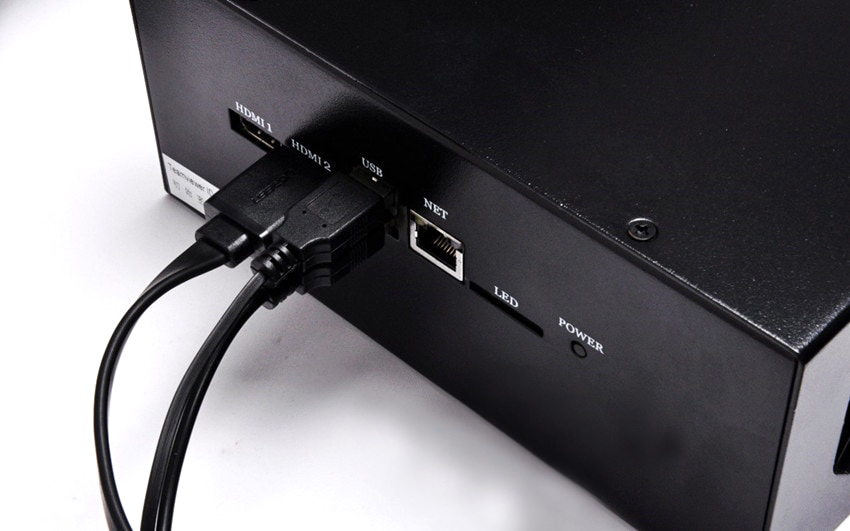
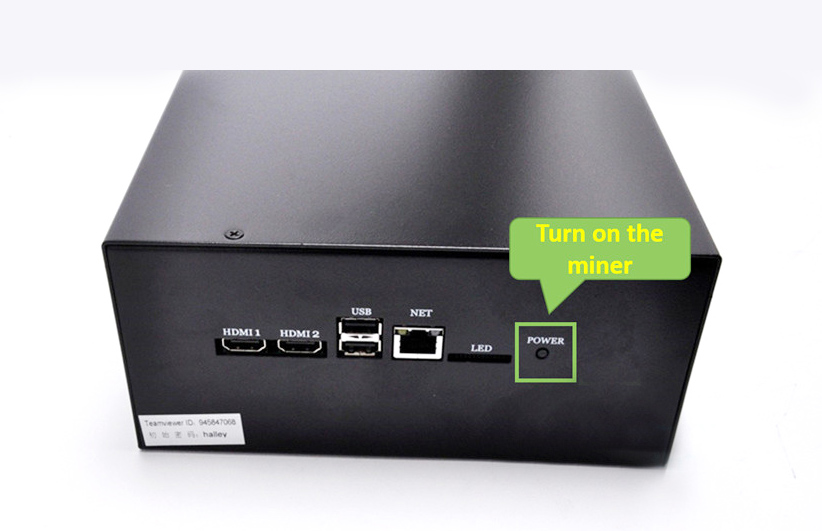
There are also the following ports on the other side of the miner, they are:
HDMI 1: HDMI for GPU
HDMI 2: Motherboard HDMI, connect the monitor
USB: for file transfer
NET: connect to the network
LED: working status indicator
The connection of miners is also very simple. First, you need to prepare a monitor (supporting HDMI), a keyboard and a mouse. Among them, the monitor, keyboard and mouse are used for miner configuration, and the monitor, keyboard and mouse are no longer needed after configuration.
First, connect all the data cables, connect the PSU to the miner through the 6PIN port.
Via the HDMI 2 port, connect the monitor to the miner.
The two USB ports on the miner connect the keyboard and mouse respectively.
Then connect the ethernet cable.
The connection is complete.
Mining guide
·Turn on the power and turn on the monitor.
·Press the "POWER" button on the miner to start the miner. Due to the small size of the "POWER" button, it is recommended to use a pin.
·The mining system of the miner is the "Windows" operating system. After a while, the Windows system will start.
We can see that ETH, Zcash, XMR mining folders, and shortcuts on the desktop. they are:
eth: ETH mining folder.
eth.bat: ETH mining shortcut.
zcash: zcash mining folder.
zcash.bat: zcash mining shortcut.
XMR: XMR mining folder.
·The mining configuration is the same as you use the GPU of your PC for mining. Next, we will take ETH and Zcash as examples to explain the miner's mining instructions in detail.
ETH mining guide
You can set it up by following the instructions below:
· Navigate to the file "eth" -> "Claymore's Ethereum AMD GPU Miner v4.1 - POOL".
·Right-click the file "start.bat" and select "EDIT" in the pop-up menu.
We will see the following ETH mining command. The content of the command is:
setx gpu_force_64bit_ptr 0
setx gpu_max_heap_size 100
setx gpu_use_sync_objects 1
set gpu_single_alloc_percent = 100
ethdcrminer64.exe -epool eth.f2pool.com:8008 -ewal 0xa51d11bf2a9aae355fd6f2a5b1b14e1404572c2 -eworker arig-apsw x -dbg -1
·If you use f2pool for mining, you just need to modify the wallet address in the command to your own.
· Press "Ctrl + S" to save the command and close the file.
·Double-click "start.bat," and mining will start automatically.
·You can also double-click the "eth.bat" shortcut on the desktop to run ETH mining after the configuration is complete.
·The configuration of different pools will be different; it is recommended to check the GUIDE page of the mining pool to learn how to configure the mining machine.
Zcash mining guide
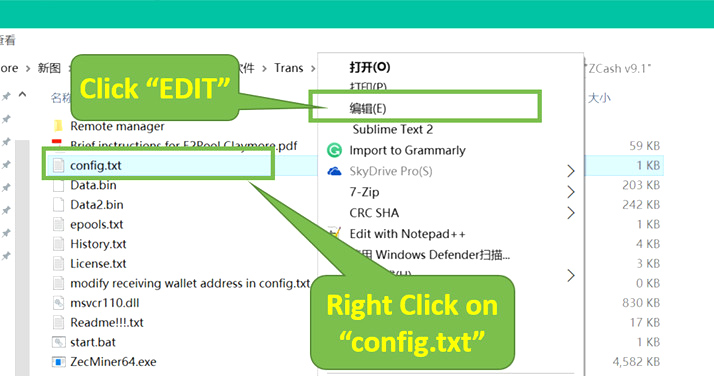
· Navigate to the file "zcash" -> "ZCash v9.1"
· Right-click the file "config.txt" and select "EDIT" in the pop-up menu.
· After clicking, you will see the following Zcash mining configuration:
· Modify the wallet address in the command to your wallet address.
· Then press "Ctrl + S" to save the command and close the file.
· Finally, double-click "start.bat," and mining will start automatically.
· You can also double-click the "zcash" shortcut on the desktop to run Zcash mining after configuration.
The content and pictures of this article are from the Internet, compiled and edited by ZEUS MINING.








Comments
Post a Comment
Tell us your opinion